![A logo for a tech-focused website that aims to simplify and streamline technology for its audience, with a clean and modern design that embodies simplicity and functionality [using a sleek and minimalistic approach] [incorporating tech-inspired elements]](https://jacksonisaac.com/wp-content/uploads/2024/03/img-i0qijphmwgcu5l9lakcrkyq6.png)

ॐ,
Spring is around the corner, and it’s that time of the year again. Starting seedlings, growing flowers and vegetables in your home, backyard, terrace or just above your workplace.
Soil composition is one the most important factors to a good harvest, and so is the right amount of moisture and nutrients in the soil.
While you can buy most potting soil with nutrients from the garden stores, watering plants is still a challenge for most of the beginners including me. There are times that I had too much or too little water, and had to google how to revive my plants.
In this post, I am going to show you how you could automate and make your home plant watering system smarter. Inspired by make event by OfferZen that I attended a while ago.
Step 1: Equipment Gathering
For this we would need few of the below things:
– NodeMCU ESP8266: Arduino Store Link
– Wires: Pi Hut product Link (or similar wires at home, hardware stores)
– Small mini water pump: Amazon reference
– Clear PVC tubes for water flow from the pump. Hardware store – *size depending on the pump outlet
– Capacitive Moisture Sensor: Pi Hut product Link
More info on sensors: https://lastminuteengineers.com/capacitive-soil-moisture-sensor-arduino/
Step 2: Configuring and testing individual components
Once you have the above components, test all the components as given in the README
If something doesn’t work yet, don’t worry. Check out the troubleshooting page.
Step 3: Connecting all the components
Now that all the components are verified to work, we will connect them all as per the circuit diagram below:

Make sure to connect the correct pins and verify before powering up.
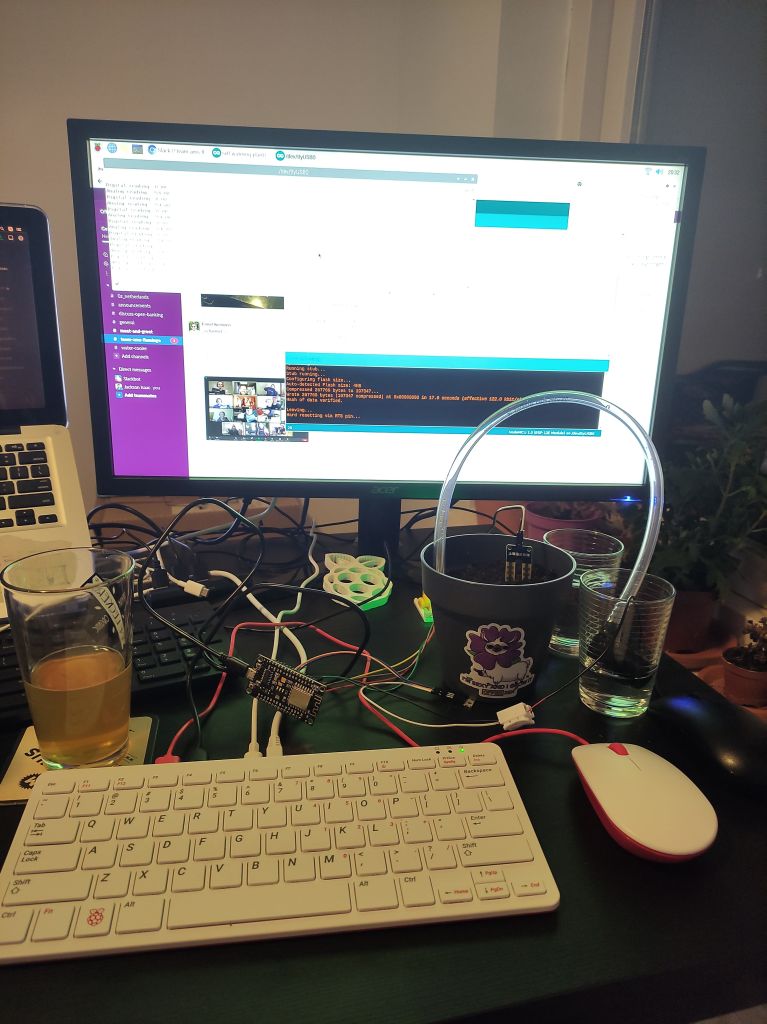
This is how my setup looked like during hacking it all together 🙂
Step 4: Code
– Install Arduino IDE on your laptop/PC
– Clone this repository
– Open self-watering-plant.ino file in Arduino IDE
– Select the correct Board in the IDE. To do this:
Tools > ESP8266 Boards (2.7.4) > NodeMCU 1.0 (ESP-12E Module)
– [Optional] Configure your WiFi and X/Twitter API keys. This is to track your plant status via Social Media.
*If you don’t want to connect to the internet, you could comment out the parts of code. Lines #147 to #152
Step 5: Testing the circuit and code
– Connect the PVC pipe to water pump outlet.
– Fill a jar or cup with water and put the water pump in the water fully
– Make sure that the other side of PVC end is on the plant pot
– Insert the Moisture sensor in the soil/pot you would like to automate watering
– Connect the NodeMCU board to the PC/Laptop with USB cable
– Upload the Sketch file to the board. To do so, follow this link
– In Arduino IDE, you will notice the system logs, which will output the moisture levels in the soil and other text outputs
– You can control the amount of water by setting different time interval in the code. Line #29
– If it waters too often or too less, based on moisture; you can play with the thresholds Line #27. Since each sensor, soil, environment conditions are different there might be different thresholds to be used.
Once this is all done, and initial tests are good; comes the real test of running this automated on power. You could connect the whole setup to a power outlet or power banks (do note that some “smart” power bank might turn off when the nodeMCU is in deep sleep).
I used to run it on power outlet, using a mobile charging adapter without issues.
Once we have moisture thresholds and water timer well, it’s time to leave it on for days and weeks and months. Tweaks are only needed when the environmental factors change and thresholds need to be modified.
There are many more ideas you could implement to improve this setup further.
I personally 3d Printed an irrigation outlet to connect to the PVC, so that water flows over the whole pot evenly and in drips.
Here’s my final setup. I have also 3d printed an enclosure for the nodeMCU and all the components in a small box.

Thanks for reading, and happy growing!
