![A logo for a tech-focused website that aims to simplify and streamline technology for its audience, with a clean and modern design that embodies simplicity and functionality [using a sleek and minimalistic approach] [incorporating tech-inspired elements]](https://jacksonisaac.com/wp-content/uploads/2024/03/img-i0qijphmwgcu5l9lakcrkyq6.png)
Hola! amigos. Here we begin with Getting started [Tutorials] with Installing Ubuntu 12.04 LTS ‘Long Term Support’ a.k.a “Precise Pangolin” which is a very stable OS as compared to other latest versions 12.10 and 13.04.

First we need to download the iso file for Ubuntu 12.04, and don’t worry it’s Free of cost, virus free and many more good things to about it.
Instructions : If you are installing along Windows 8 or UEFI firmware then, follow the steps here.
Steps to follow:
A) Setting up Installation Disc:
I. Download Ubuntu 12.04 LTS 32-bit (32-bit being supported by all hardwares.)
Ubuntu can be installed along with Windows by enabling Grub menu or as a single OS for your desktop/laptop.
II. Burn the iso file on a DVD/CD. If you want to burn the image on USB drive then follow the steps given below according to the OS you are currently using.
Note: Backup the USB drive before continuing with step II, as all the data will be formatted and the image file will be burnt on the USB drive. And later do not make changes in the file directory of the USB drive, for it to function properly and the Installation to be error-free.
III. Reboot the system.
IV. When you see the startup screen goto the BIOS setup by pressing ‘DEL’ button or ‘ESC’ button, according to the key option displayed on the screen. Usually it is the ‘DEL’ button.
Many users prefer tapping ‘DEL’ button continuously.

V. Navigate to the BOOT Menu.

VI. Select Boot Device Priority/Similar for different BIOS versions.
VII. a)Set the 1st Boot Device to CD/DVD ROM if the image file is burnt on disc. OR

VIII (i). After making sure everything is configured properly, Press ‘F10’ to save changes and exit. And the machine will automatically reboot.
VIII (ii). Navigate to Exit menu, and select Exit And Save Changes/Similar. Machine will reboot.

The machine will reboot automatically and the device selected as 1st Boot Device will be booted and the installation of Ubuntu 12.04 LTS will be loaded.(image file been burnt on the Drive/Disc)
Do not remove the Disc/USB Drive when the machine reboots
B) Ubuntu Installation:
You can either try Ubuntu without installing or you can Install it along with other OS or as a single OS.

I. Select Install to Continue installation of Ubuntu 12.04.

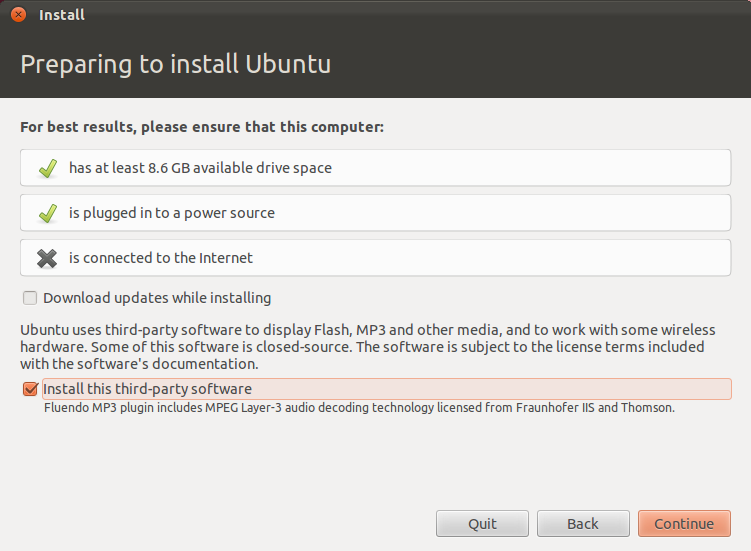
II. Prepare to Install.
If you do not have Internet connection don’t worry Installation won’t be effected. Atleast 8.6 GB of space is required. But I recommend to have atleast a 100 GB hard drive to use Ubuntu efficiently and to it’s best.
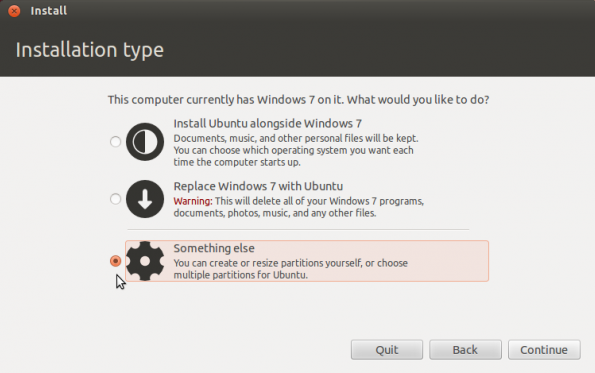
III. Select ‘Erase Disk and Install Ubuntu’ to erase all the contents on the disk and install fresh.
OR
Select ‘Install Along with Windows/other OS’ to install Ubuntu alongside another OS.
OR
Select ‘Something Else’ to manually partition the disk. (This option is used by Advanced Users to Install one or more OS on single HDD).
Here I will guide you with Partitioning of disk.
C) Partitioning Disk
I. Create a new partition table.

II. Specify most of the disk space for ‘/’ (root folder) and ‘/home’ (home Folder), as they would be holding all your data and applications etc.
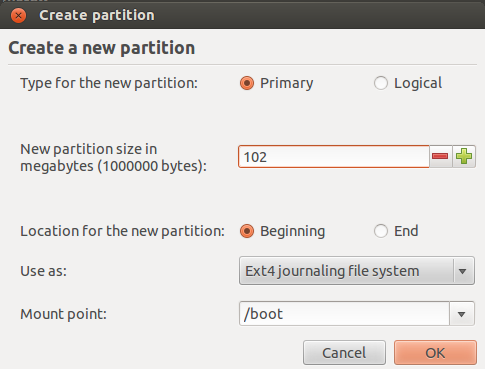
Select Ext4 Journaling file system. It supports large individual file sizes ranging from 16 GB to 16 TB as compared to older Ext file systems like Ext2 and Ext3.


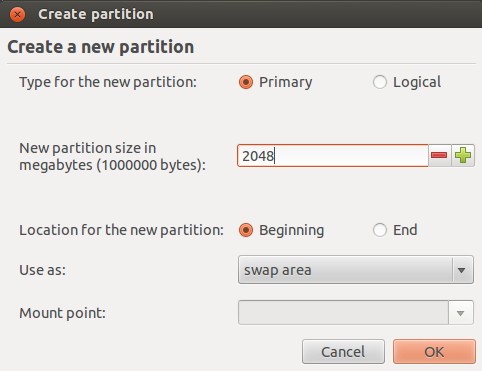
III. Specify around 2048 MB or more according to the size of your RAM.
Swap works as a Virtual memory OR in other words it is like a RAM located on your HDD. But remember RAM of size 2 GB to 4 GB would do fine, Swap area is just used for processes which require more RAM space and are for emergency use only.
Do not depend on Swap Area to function as optional RAM as it would drastically make the machine slow.
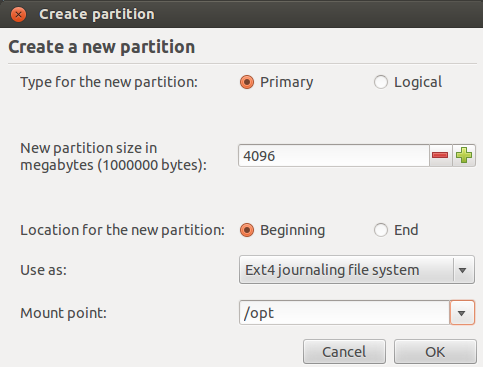
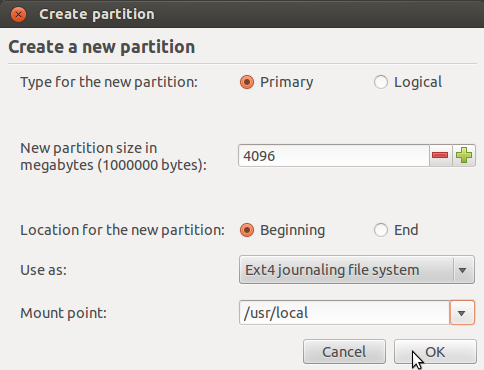
Similarly assign disk space ranging from 200 MB to 1024 MB according to your needs for ‘/boot’, ‘/usr’, ‘/var’, ‘/opt’, ‘/usr/local’.


IV. After all the proper partitioning is done and disk space specified for all folders properly, and no errors. Click ‘Install Now’.

V. Select your Time Zone.

VI. Choose your correct Keyboard layout. If not sure you can test it in the text field available to identify your keyboard layout.

VII. Fill your Details, so that the OS can create your user for Login and other privileges like root and super user (which is required to install applications, change file permissions, etc).

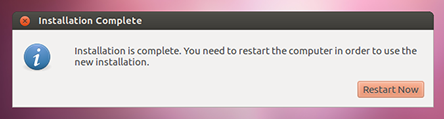
VIII. After Installation, Select Restart now and the system will be rebooted and Ubuntu 12.04 LTS is ready to use, as fresh as cookie in an oven.:)
After Installation, Roll back the 1st Boot Device to the default Drive (Hard Disk Drive/CD-ROM), follow steps here
Let the Windows be open, and feel the Freedom.


A very good ,hands on kind of a post! keeping technical jargon to a low is a very good idea 🙂
LikeLike
Thanks 🙂
It took me few days to collect all the data and put it together. But it was worth, as many would face problems as I did.
It was a small part from my side towards Open Source Community. I encourage everyone to use Free and Open Source software.
This is a step-by-step tutorial. I will be soon posting a more easy, fast and efficient method too.
LikeLike
Reblogged this on Minerva and commented:
perfect for a beginner!
LikeLike